

An innovative project involved some high school students from the hinterland of Milan last June. Objective: the creation of a Mars Rover prototype using a smart car. At the core of the project, once again, is the unparalleled Raspberry Pi.
You will find all the details for the implementation in this article, and who knows, perhaps it will inspire someone else to propose it in other companies or schools.
PROJECT OBJECTIVES
The activity took place over the course of a week, with the students engaged from 9:00 am to 5:00 pm every day. The purpose was to provide an insight into how a project develops in a business context, outlining the phases from the conceptual stage to commercialization.
In this specific case, the project’s objective was to create a miniature prototype of a Mars Rover using Raspberry Pi and a smart car, highlighting the critical aspects to consider during the development of the final product. The rover had to be remotely controlled, capture video images, and collect relevant data such as temperature, pressure, humidity, battery status, which had to be stored in appropriate databases and then displayed in real-time.
First and foremost, it’s important to note that we didn’t start from scratch; the Freenove SmartCar model provided the basic mechanics for movement. Everything else, including control software, data collection, and sensors, was developed by the students.
Okay, I can already hear the criticisms… thinking that this little device could go to Mars is a bit much, so the name Mars Rover is a tad exaggerated. We agree, but come on, let it slide; it was meant to make things more intriguing.
On the last day, there was a presentation to the public of what was intended to be an innovative project using Raspberry Pi. The audience included the students themselves, parents, other students, and the company staff who had been following their progress.
SUMMARY OF OPERATIONS TO GET THE ROVER UP AND RUNNING
These are the operations to perform to get the Rover up and running, which we will see step by step in the following paragraphs:
- Assemble the Smart Car, which we will now call Rover.
- Load the operating system image with the necessary software onto the Raspberry Pi, which you can find here.
- Configure the InfluxDb database.
- Open the control app on your smartphone using Mit App Inventor.
- Connect the smartphone to the Mars Rover and make it move.
- Real-time visualization of temperature, pressure, humidity, and battery status using Grafana.
Let’s proceed one step at a time and see how to get the Rover up and running.
OVERVIEW
Let’s take an overall look at the elements that make up the Mars Rover and how it is controlled.
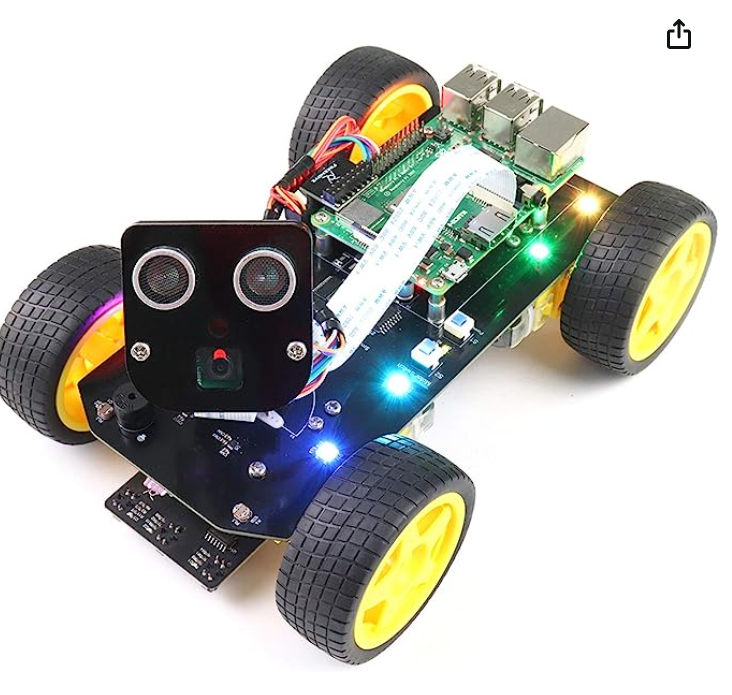
Smart Car
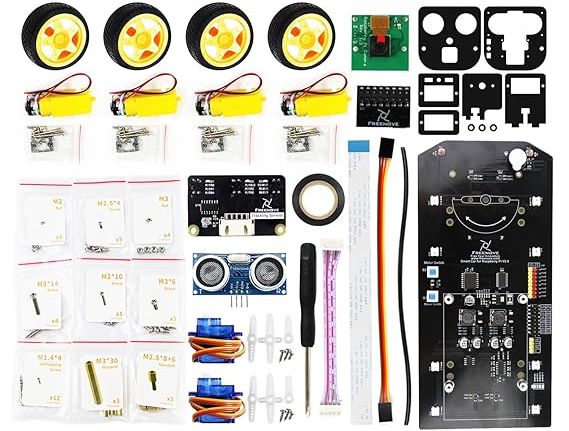
The product is quite well-known among hobbyists; we’ve named it the Mars Rover, and it’s the Smart Car with Raspberry Pi. It’s a straightforward assembly kit, and the instructions are provided by the manufacturer.
WARNING: The Raspberry Pi is not included in the kit; you will need to purchase it separately. I recommend opting for the most economical one available, as the required performance is minimal. A Raspberry Pi 3 is more than sufficient; although the PI4 and PI5 are undoubtedly suitable, in my opinion, they are oversized for the task.
You will also need to acquire 2 rechargeable 3.7V lithium batteries, ICR18650 model, along with the corresponding battery charger. These are essential for powering the motors and the Raspberry Pi since you’ll undoubtedly want to avoid keeping the rover connected to a power cable while it’s in motion.
The smartcar kit comes equipped with various sensors, including ultrasonic sensors to detect the distance of objects in front (the two front “eyes”), a camera, and infrared sensors for line tracking, which involves detecting a black line on a white background on the floor. The line tracking functionality is not utilized in this context.
Other components
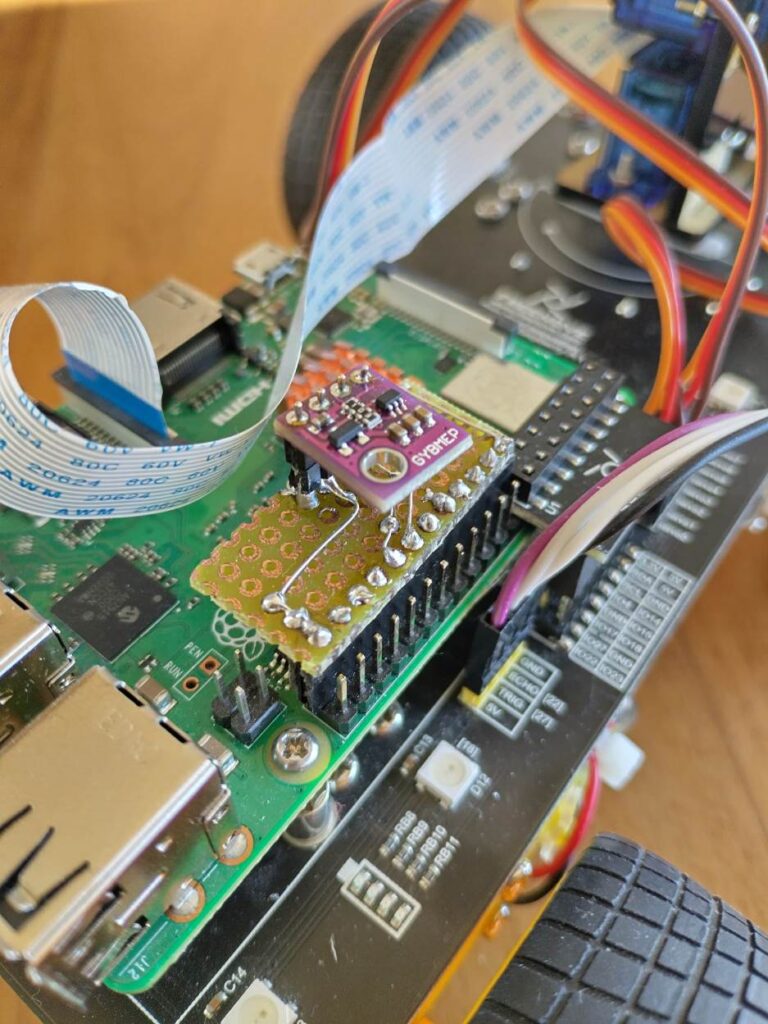
We have equipped the smartcar with a BME280 sensor. This is a small integrated device that detects weather-related data such as temperature, atmospheric pressure, and humidity, sending them to the Raspberry Pi through a serial protocol.
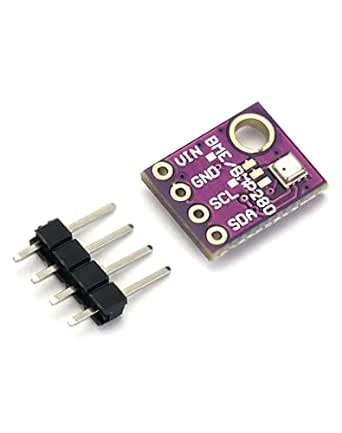
You can find it online, and it is really inexpensive.
ASSEMBLY
As mentioned earlier, the assembly of the rover is simple and, I would add, enjoyable. It will keep you engaged for about an hour. I recommend paying particular attention to the assembly of the motors. Follow the illustrations carefully to orient them correctly, saving yourself the hassle of having to disassemble and rotate them if you discover too late that they are rotating in the wrong direction. Also, take care with the camera; the flat cable and its connector are quite delicate. Pay attention to the orientation of the cable and tighten the connector gently.
As for the BME280, it should be connected to the Raspberry Pi’s ribbon connector in the following way:
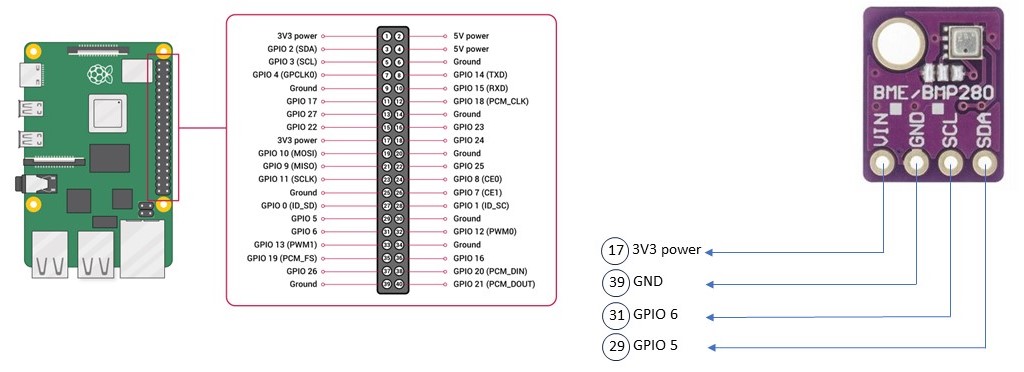
The connection can be made using Dupont wires; we chose to let the students do some DIY work with a multi-hole board and a soldering iron. The result is this makeshift setup, which may not be very elegant but is certainly functional.
SOFTWARE
The Raspberry Pi needs to be prepared with the operating system and the necessary software to make the Rover move.
- Download the image containing the pre-configured and working operating system and software from here; it’s approximately 8GB.
- Use the Win32DiskImager program to flash a memory card with the downloaded image.
- Insert the memory card into the Raspberry Pi.
OPERATION OF THE MARS ROVER AND SOFTWARE
Powering on and connecting the smart car
The first thing to note is that on the main board, you have 2 buttons labeled S1 Power Switch and S2 Load Switch.
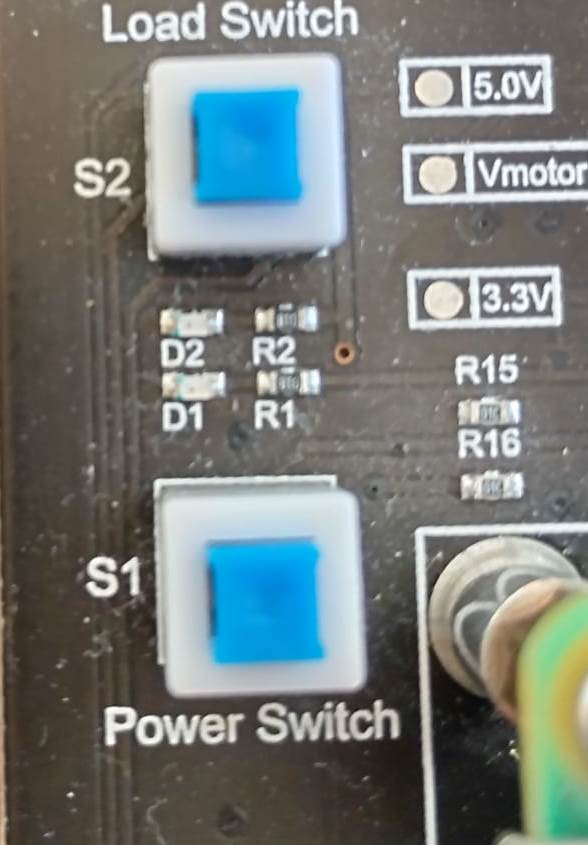
S1 Power Switch powers only the Raspberry Pi through the batteries but does not power the motors. If you need to turn on the Raspberry Pi without moving the Rover’s motors, my advice is to use an external power supply connected to the micro USB power port.
S2 Load Switch powers the motors. You need to press both S1 and S2 and have charged batteries if you want the motors to spin and the Rover to move.
To summarize:
- If you only need to power on the Raspberry Pi, press S1. Alternatively, connect an external power supply to the Raspberry Pi.
- If you need to move the Rover and want a wireless setup, press both S1 and S2.
Four LEDs located at the back of the board indicate the battery charge status.
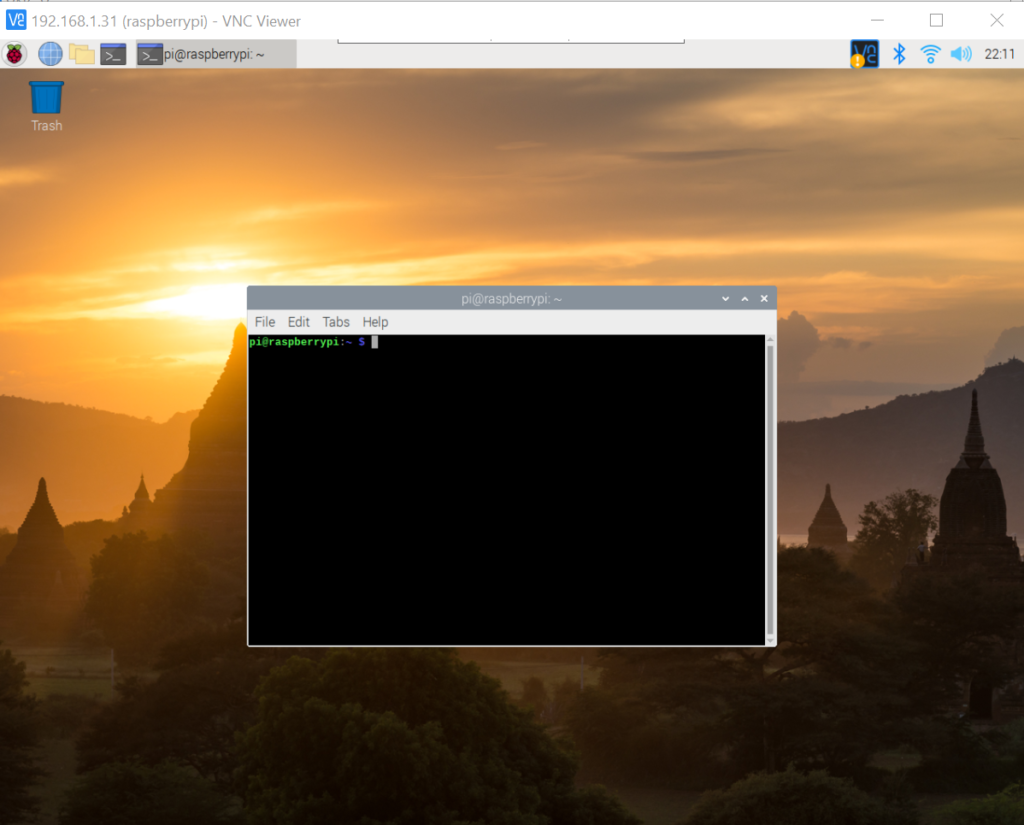
The installed operating system is the classic Raspberry Pi OS (formerly Raspbian) with its desktop and graphical interface. However, you don’t need these for operation since the essential commands to run the programs and move the Rover are given via the shell. You can either connect a monitor and open a command window:
Or, even better, connect via SSH to the Raspberry Pi from another PC using a client like PuTTY.
Launch PuTTY and connect to the Raspberry Pi’s address (in the example below, 192.168.1.31):
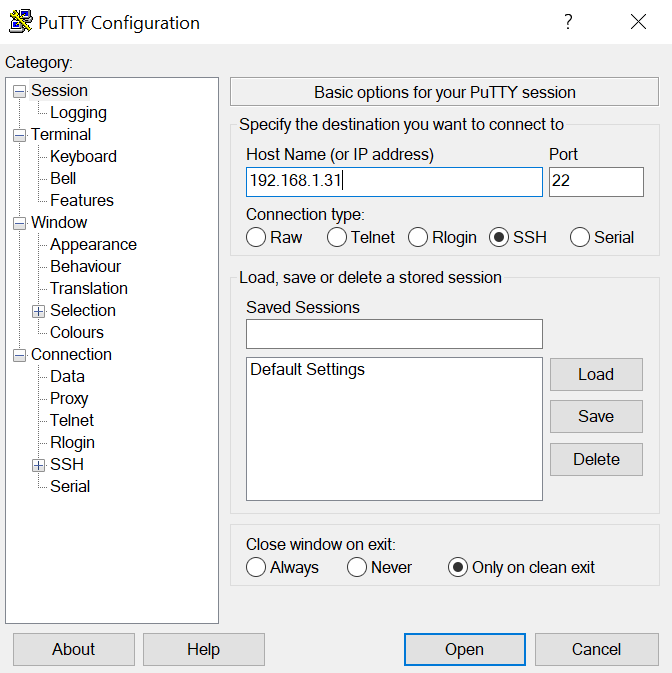
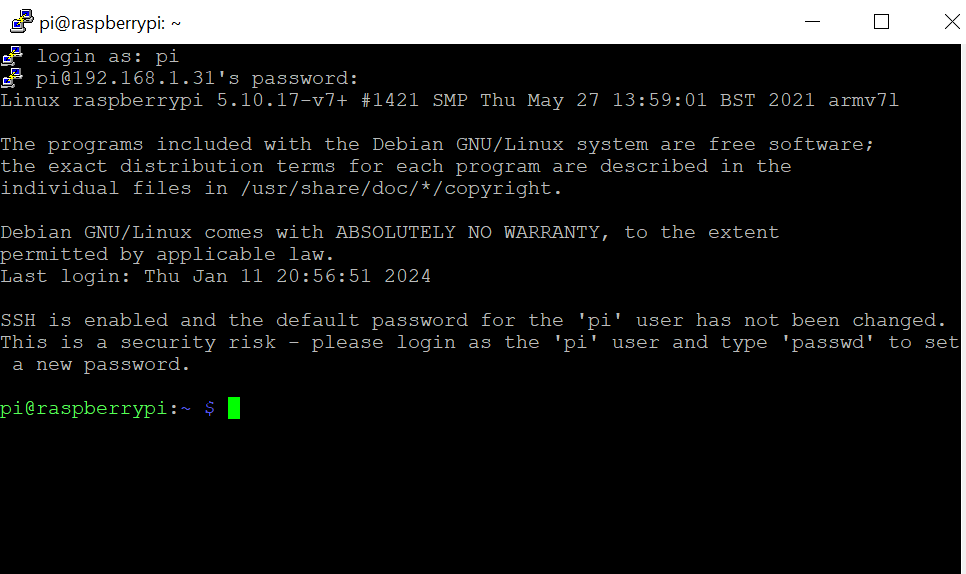
Username: pi
Password: raspberry
Great, you’re connected.
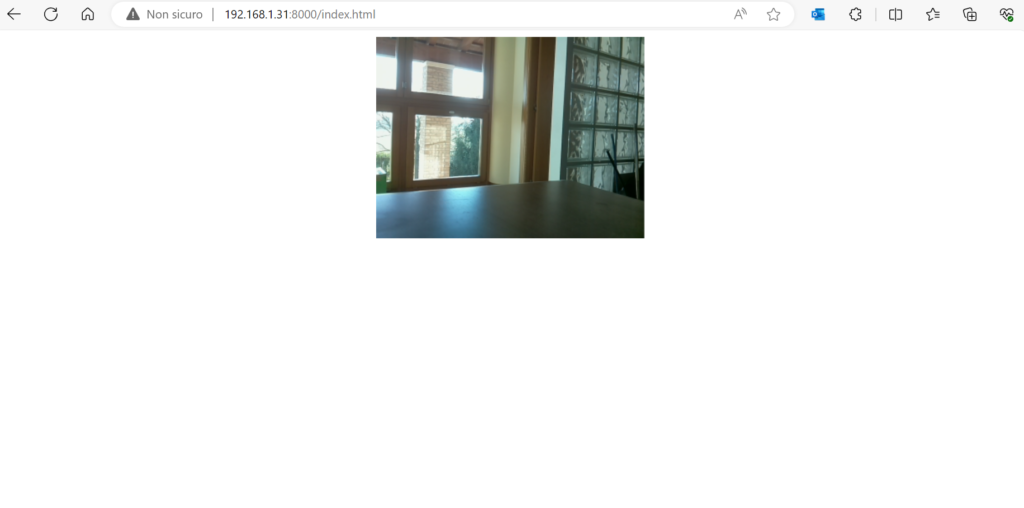
Do a quick initial test to see if the camera works. From a PC connected to the same WiFi network as the Raspberry Pi, open the browser and enter the address:
http://<Raspberry IP>:8000, for example: http://192.168.1.31:8000
You should see the camera image.
SOFTWARE – SIMPLE SCRIPTS TO MOVE THE MARS ROVER
From the shell to which you connected to the Raspberry Pi, enter the command:
cd MarsRover
to go to the folder containing the programs. Make sure that both buttons S1 and especially S2 are pressed, ensuring that the motors are powered. Enter the command python Motor.py followed by Enter.
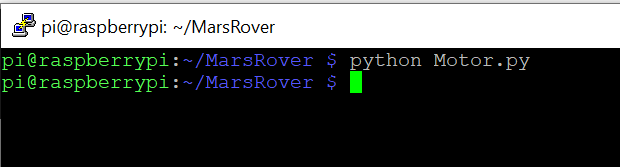
The motors will start to rotate, and the Rover will move: 3 seconds forward, 3 seconds backward, 3 seconds left, 3 seconds right, then it will stop. You can also analyze the Python program; it’s quite intuitive. Here is the part of the code that moves the motors.
def loop():
    PWM.setMotorModel(2000,2000,2000,2000)       #Forward
    time.sleep(3)
    PWM.setMotorModel(-2000,-2000,-2000,-2000)   #Back
    time.sleep(3)
    PWM.setMotorModel(-900,-900,900,900)       #Left
    time.sleep(3)
    PWM.setMotorModel(900,900,-900,-900)       #Right
    time.sleep(3)
    PWM.setMotorModel(0,0,0,0)                   #Stop
To test the buzzer functionality:
python Buzzer.pyIn the same folder, you’ll find some scripts that are also described in the smart car manual. I recommend trying out a few and taking a look at the code to understand how it works. Then, proceed to the next paragraph.
General structure of the Mars Rover project
Up to this point, it has been about assembling a smart car with a Raspberry Pi and making it move, so nothing particularly complex or new compared to what is already expected from the smart car manufacturers.
The most fun and engaging part of this project was the development of a smartphone app that communicated with the Rover and made it move. Simultaneously, the Rover had to collect temperature, pressure, and humidity data and send it to a database. This diagram summarizes everything:
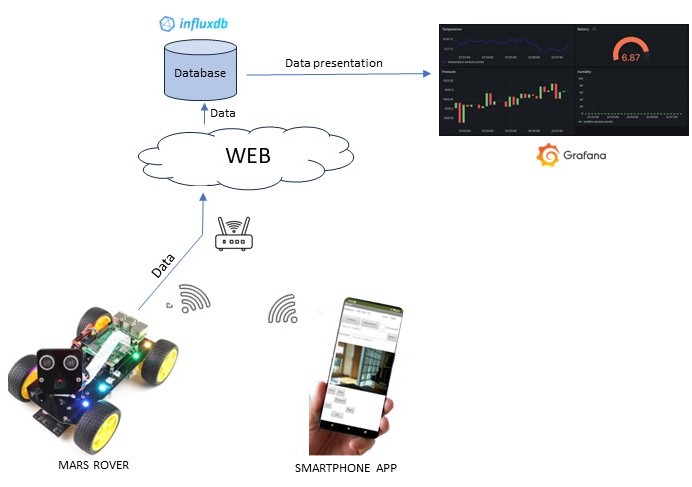
The communication between the Raspberry Pi of the Rover and the smartphone occurs through a Python application on the Raspberry Pi, which opens a socket connection and listens for incoming messages. Simultaneously, an app is launched on the smartphone connected to the same network, and this app, in turn, connects to the socket. At this point, the smartphone app and the Raspberry Pi can communicate.
We have defined a protocol, specifying what actions the Rover should take upon receiving certain messages from the app.
Additionally, the Python application periodically sends data read from the BME280 sensor to a cloud database called InfluxDB. Finally, the data is retrieved from the InfluxDB database and presented through the Grafana tool.
How to Set Up Everything – Step by Step
Let’s go through the process outlined above, step by step.
Verify the Connection of the BME280 Sensor
If the sensor has been connected as previously described, it will transmit data through the I2C serial port number 4. Verify the hexadecimal address of the BME280 using the command:
sudo i2cdetect -y 4
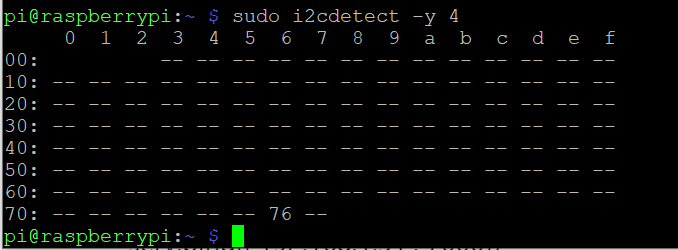
It should be 0x76, as seen in the figure above. If it is different, make a note of the number. If no address appears, check that you have connected the BME280 correctly.
Creating an InfluxDB Account
InfluxDB is the cloud database where we will upload temperature, pressure, humidity, and battery status data collected from the sensor.
Go to the InfluxDB website, create an account, and log in.
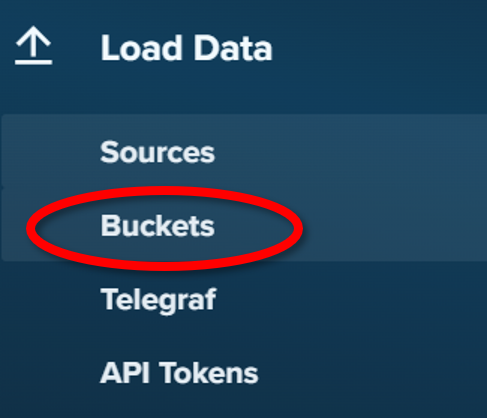
Click on “Load Data” and then select “Buckets.” A Bucket is a data container.
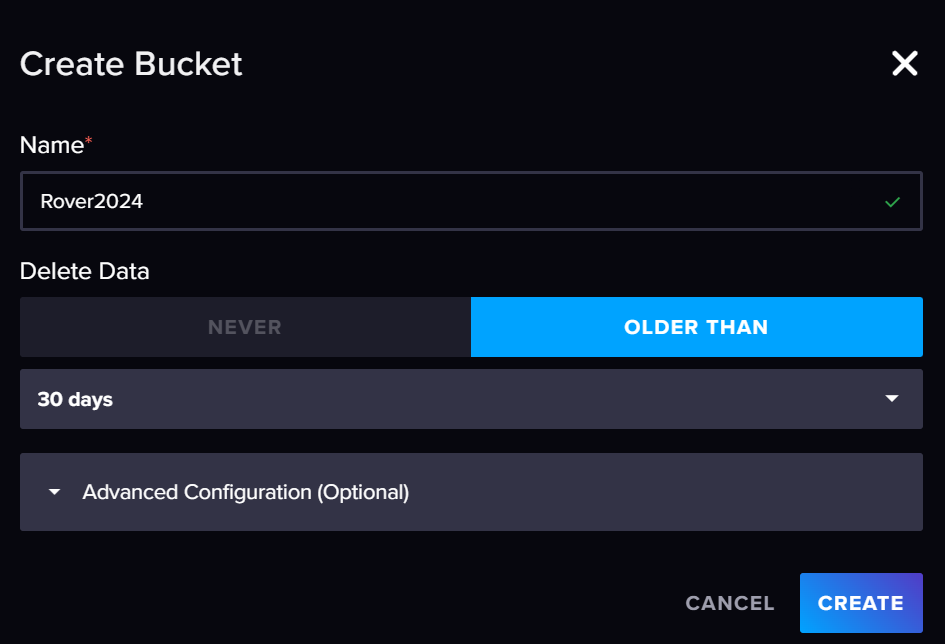
Press the +CREATE BUCKET button to create a new Bucket. Name it, for example, Rover2024, and leave the other parameters at their default values. Press CREATE to complete the operation.
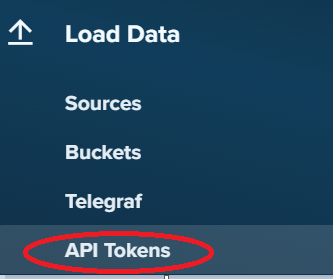
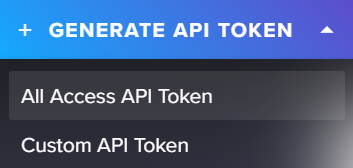
Go back to the menu on the left and this time select API Tokens.
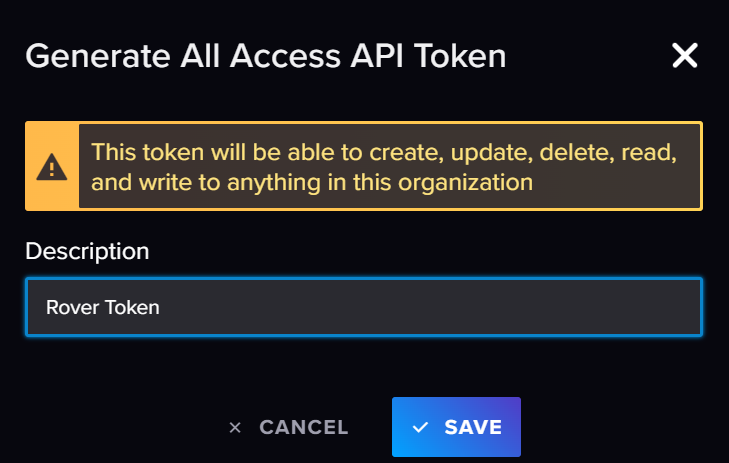
Then click +GENERATE API TOKEN and select All Access API Token.
Give a name to the token and press SAVE
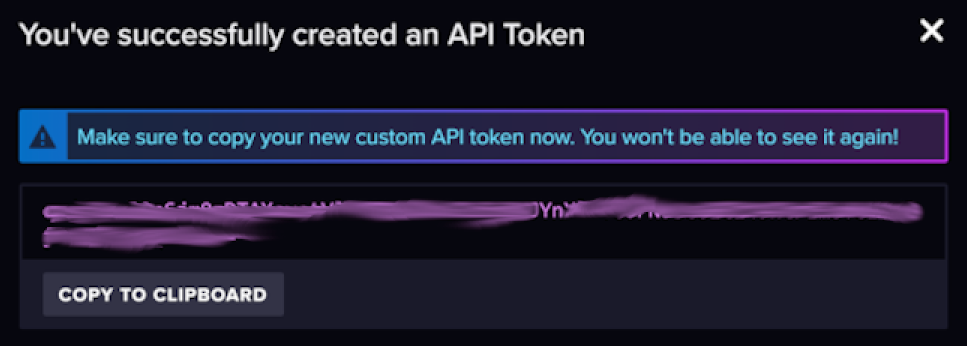
In the next screen, your token will appear. Please be cautious as this is the only time you’ll see it. Press the COPY TO CLIPBOARD button and save it somewhere secure.
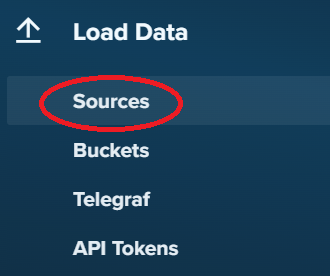
Go back to the left-hand menu, click on Load Data, and this time select Sources.
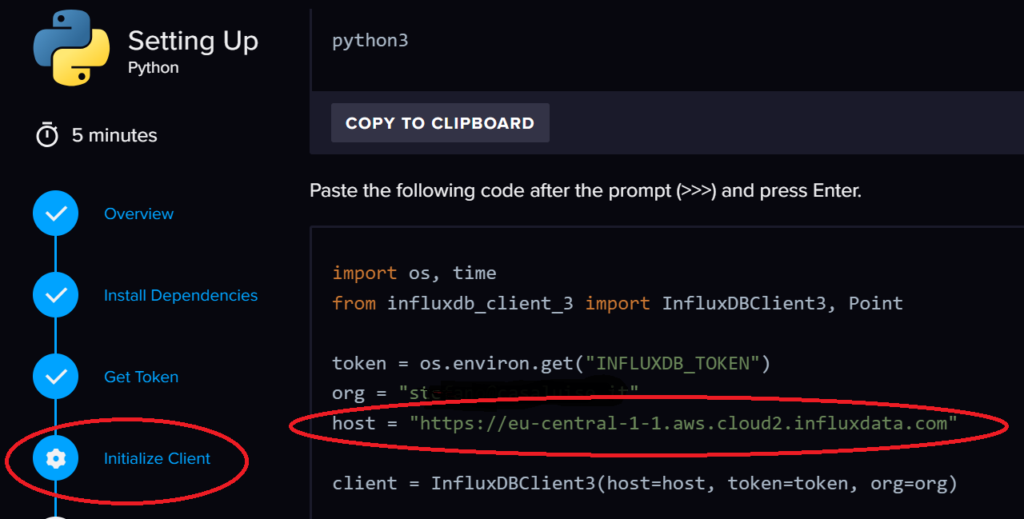
Then, in the middle of the screen, under Client Libraries, select Python.
Go to the Initialize Client section and copy the host address
As for the InfluxDB configuration, that’s all.
Settings for the Socket Connection Program
The Python application that provides the socket connection with the smartphone app is located in the MarsRover folder. Enter the folder and open the file socket3.py with a text editor.
nano socket3.pyGo to the section labeled #Influxdb code

Insert the token you copied earlier under the corresponding section. Use the email with which you registered for InfluxDB as the organization. For the URL, use the host address you copied earlier.
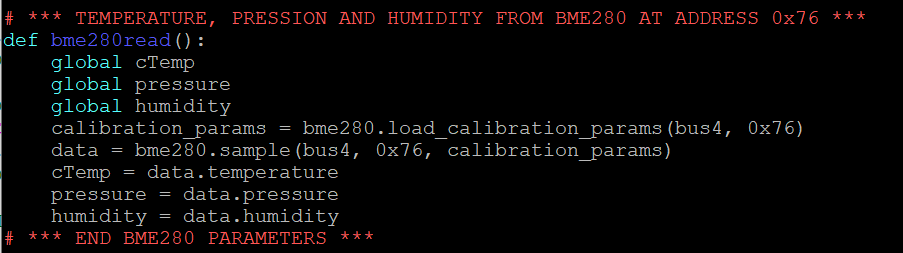
Next, go to the section labeled TEMPERATURE, PRESSURE, AND HUMIDITY FROM BME280 and modify the hexadecimal address of the sensor if it is different from 0x76. Leave the rest unchanged.
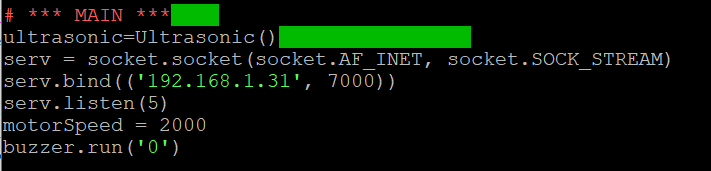
Finally, go to the MAIN section and change the Raspberry Pi’s IP address to the one assigned in your WiFi network. In the example below, it is 192.168.1.31, but in your case, it might be different. The port 7000 remains unchanged.
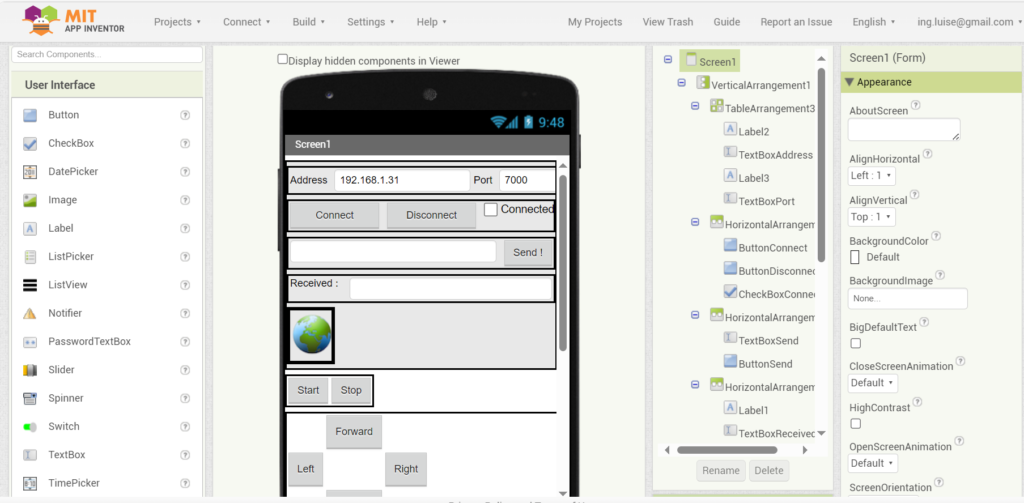
The smartphone app to control the Rover
Let’s now move on to the smartphone app that controls the Mars Rover, representing the innovative aspect of this Raspberry Pi project, along with the data storage in a cloud database. This app has been developed using Mit App Inventor.
From your PC’s browser, visit the Mit App Inventor website and import the project using a file named Rover130523.aia, which you can download from here.
Here is the interface that you will encounter:
On your smartphone, install the MIT AI2 Companion app and open it. Then, select “Scan QR code.” From your PC’s browser, choose “Connect” -> “AI Companion.”

Capture the QR Code using your smartphone camera. At this point, the app should open on your smartphone.
Connection between the App and Rover
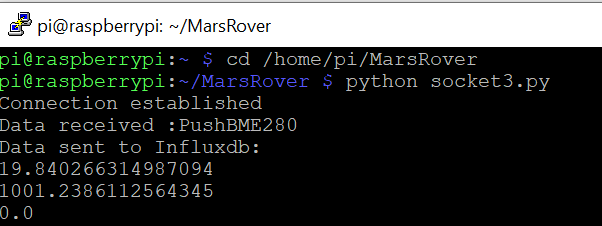
Return to the shell where you are connected to the Raspberry Pi.
Navigate to the /home/pi/MarsRover folder where the socket3.py program is located and run it with the command python socket3.py.
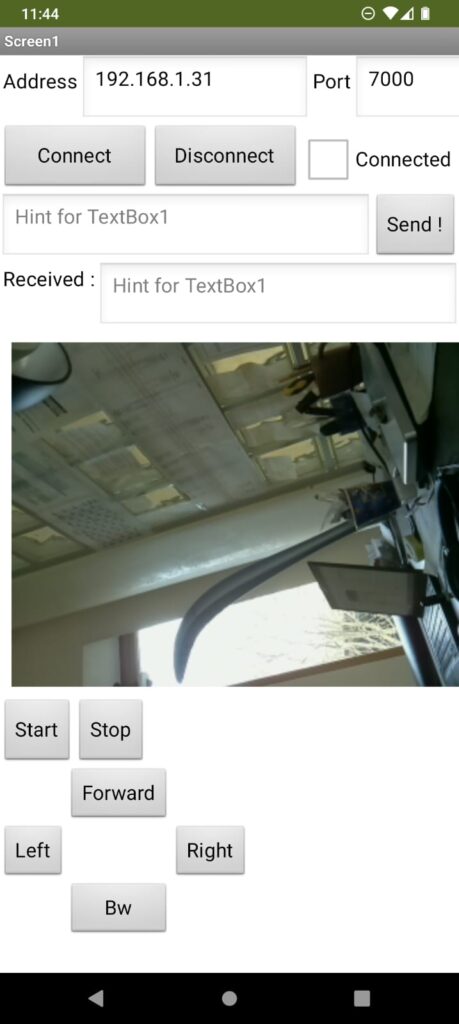
Open the app on your smartphone, ensure that the IP address displayed at the top of the Address field matches that of your Raspberry Pi, then press Connect.
In the shell, you should see the message “Connection Established.”
The smartphone and Mars Rover are now connected
Pressing the Forward, Bw, Left, and Right buttons should initiate movement. You will also notice that it is starting to send BME280 data to InfluxDB.
If everything has worked correctly up to this point, you should be able to control the Rover’s movement and view the camera feed on your smartphone.
Analysis of BME280 Data
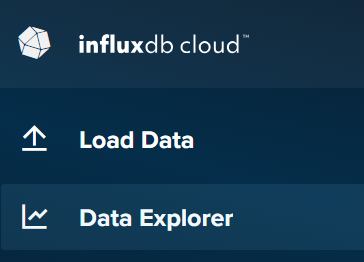
Go back to your InfluxDB page, this time select Data Explorer.
In the central window, you will see Flux language code used for data filtering. Select all and delete it.
Press the + NEW SCRIPT button.
Enable the Flux Sync selector; this way, any selection you make from now on will be automatically translated into Flux language.
Choose the Bucket named Rover2024, set the measurement as rover, and finally, select the 4 fields: battery, humidity, pressure, and temperature.
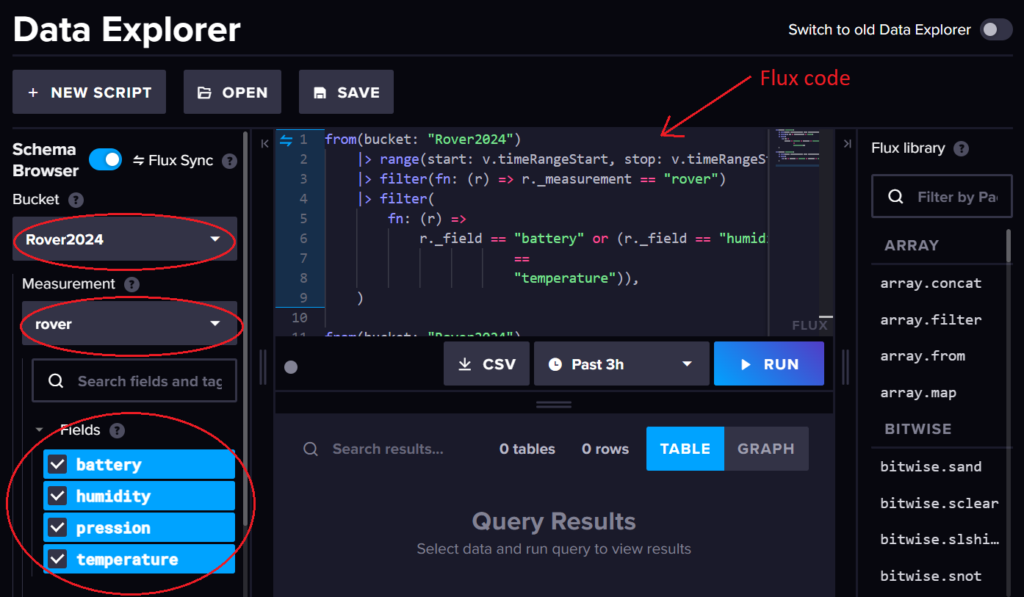
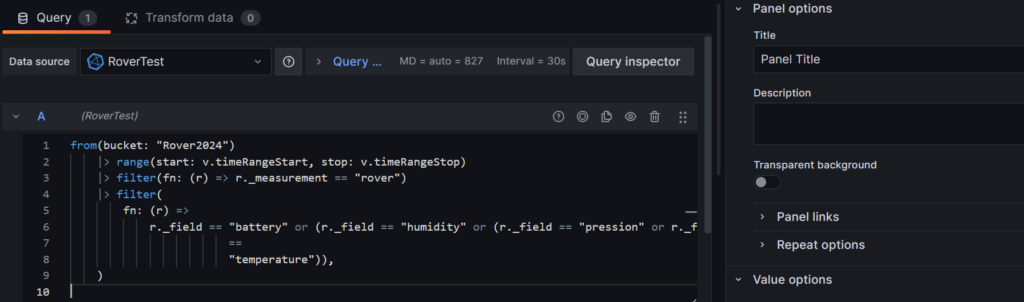
The Flux code that will appear in the center will be similar to this
from(bucket: "Rover2024")
|> range(start: v.timeRangeStart, stop: v.timeRangeStop)
|> filter(fn: (r) => r._measurement == "rover")
|> filter(
fn: (r) =>
r._field == "battery" or (r._field == "humidity" or (r._field == "pression" or r._field
==
"temperature")),
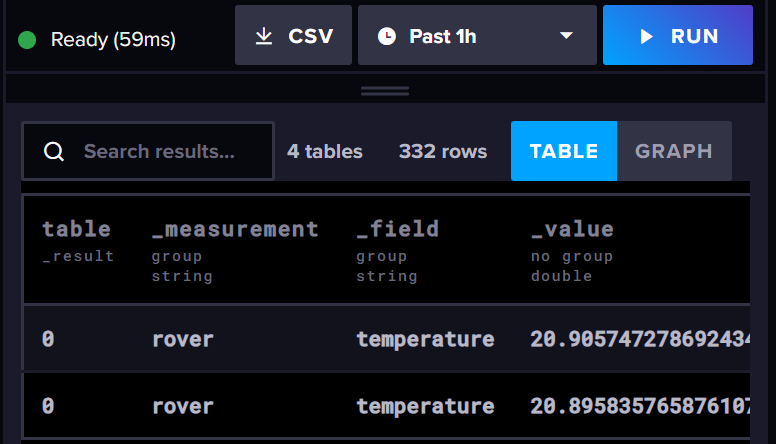
)Press RUN. In the table, you will see the values transmitted so far by the BME280
Data Visualization with Grafana
Now that you have data in the InfluxDB database, you can use a tool like Grafana to visualize it.
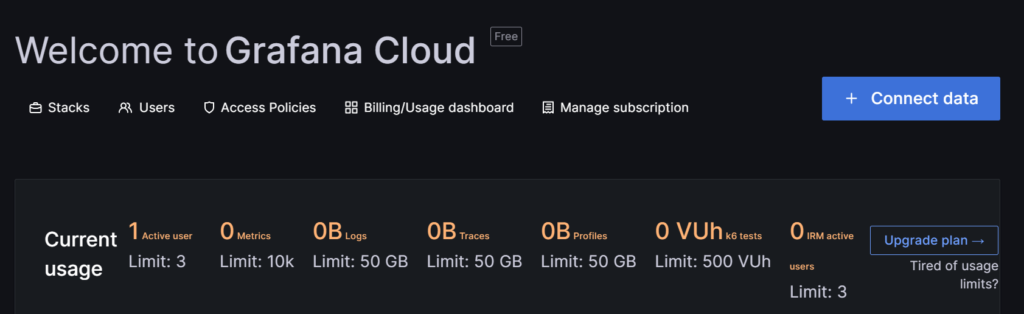
Go to the Grafana website: Grafana – The open observability platform | Grafana Labs and create a free account.
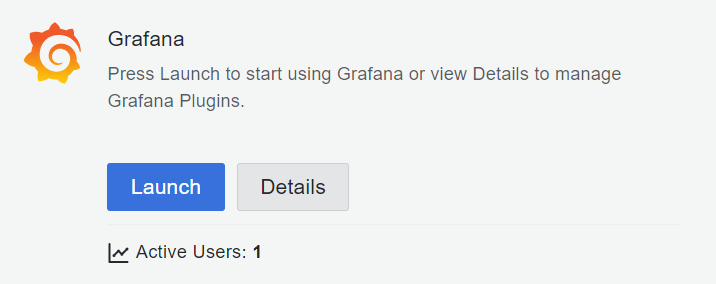
Select My Account, and in the opened page, click the Launch button to open Grafana
A loading window will appear,
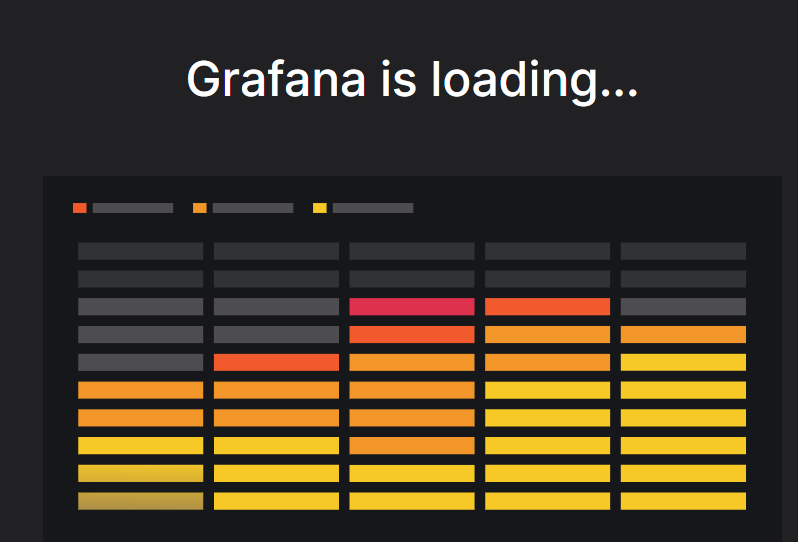
and after a moment, the control panel will be displayed.
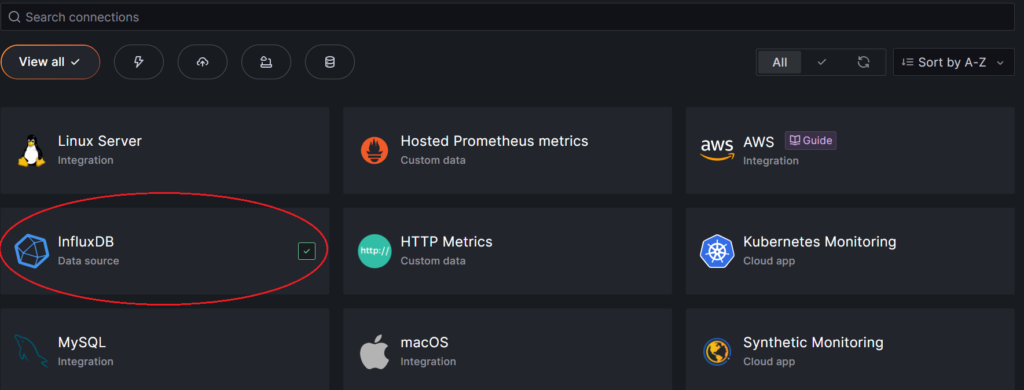
Press + Connect data
then select InfluxDb
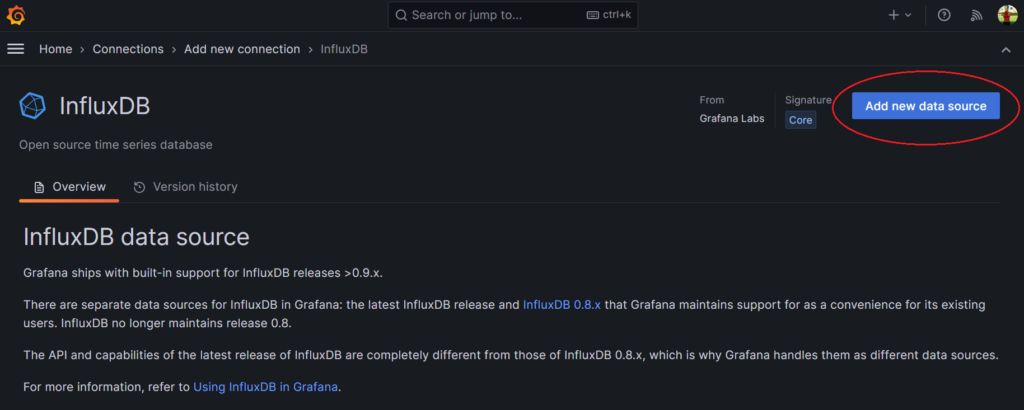
In the opened window, select “Add new data source.”
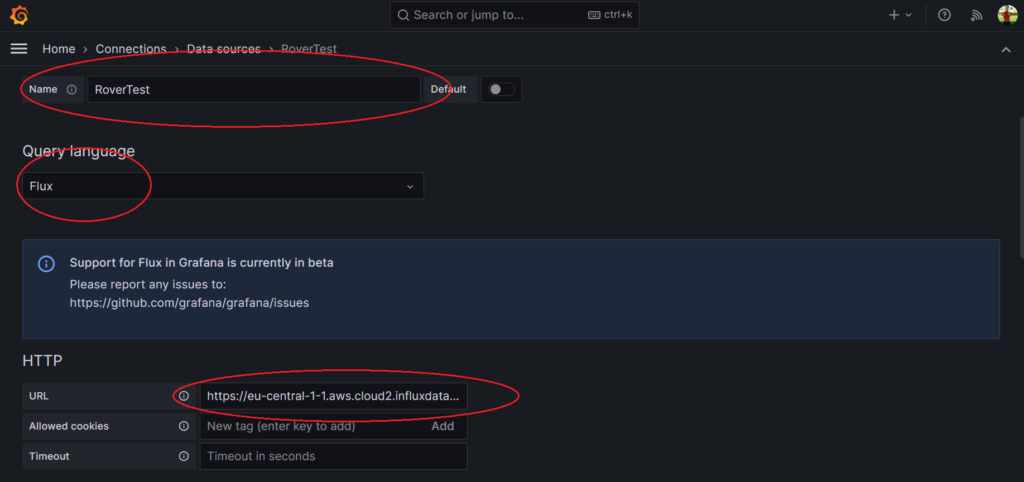
In the next window, give a name to this session.
For the Query language, select Flux.
URL: Use either https://eu-central-1-1.aws.cloud2.influxdata.com/orgs/1571cd2f28adf333/data-explorer?fluxScriptEditor or the one previously obtained from InfluxDB
Continue scrolling down.
In the Basic Auth Details section, enter your InfluxDB credentials:
- Organization: Your InfluxDB login email
- Token: The token obtained earlier
- Default bucket: Rover2024 or the one you set in InfluxDB
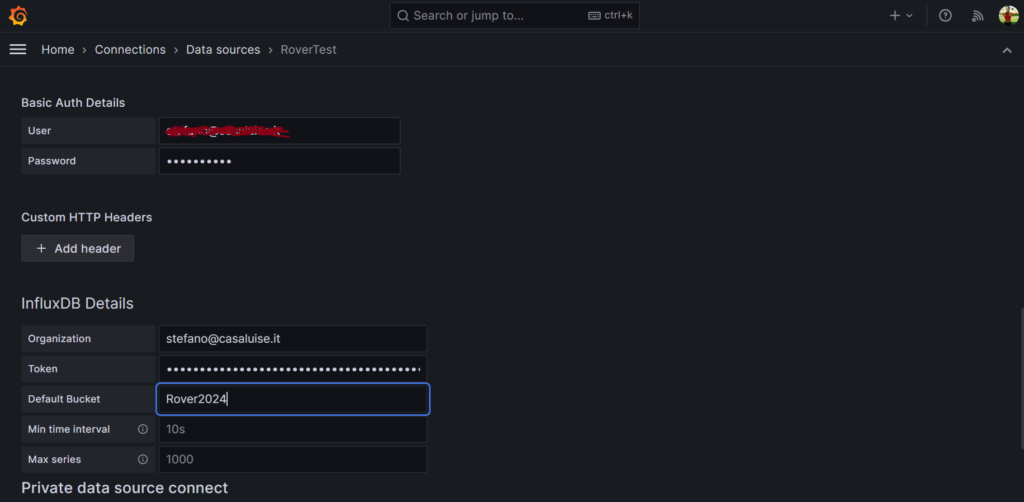
Press SAVE & TEST

If everything worked correctly, you should see the message

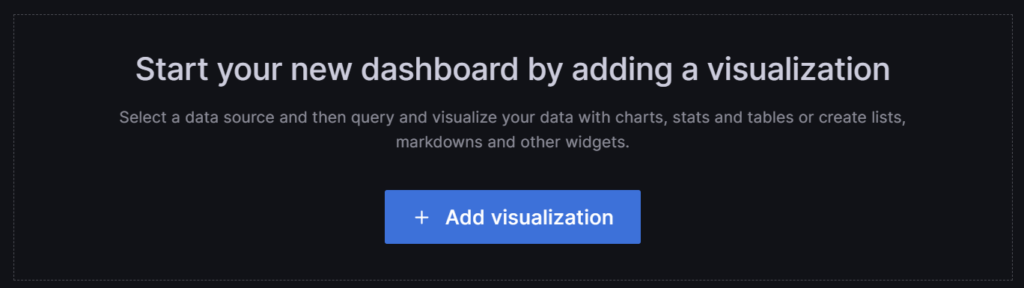
Now, go back to the top of the same page and press the “Build a dashboard” button

Then, click on “Add Visualization”
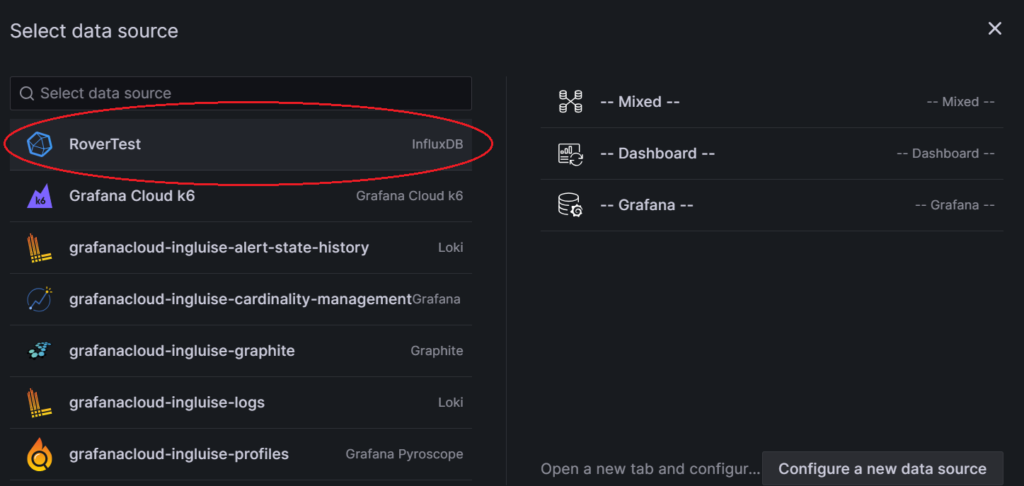
And finally, select the data source “RoverTest” that you just created
At this point, you can get creative in creating the dashboard.
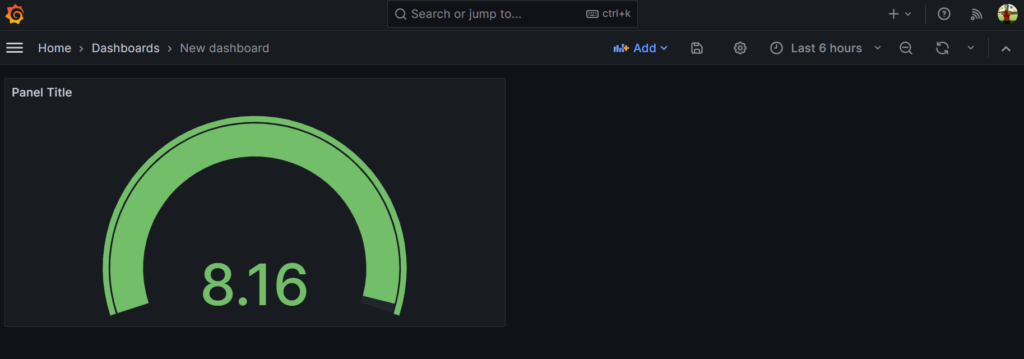
For instance, choose “Gauge” as the visualization in the top-right corner.
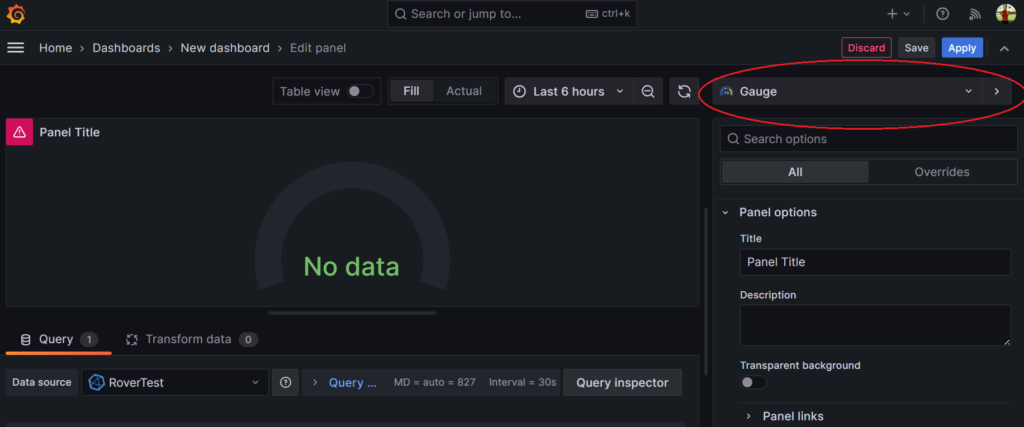
Now, at the bottom, copy the Flux code, leaving the filter only for battery data, as shown in the figure below
Press Apply.
The battery voltage will be displayed on the dashboard
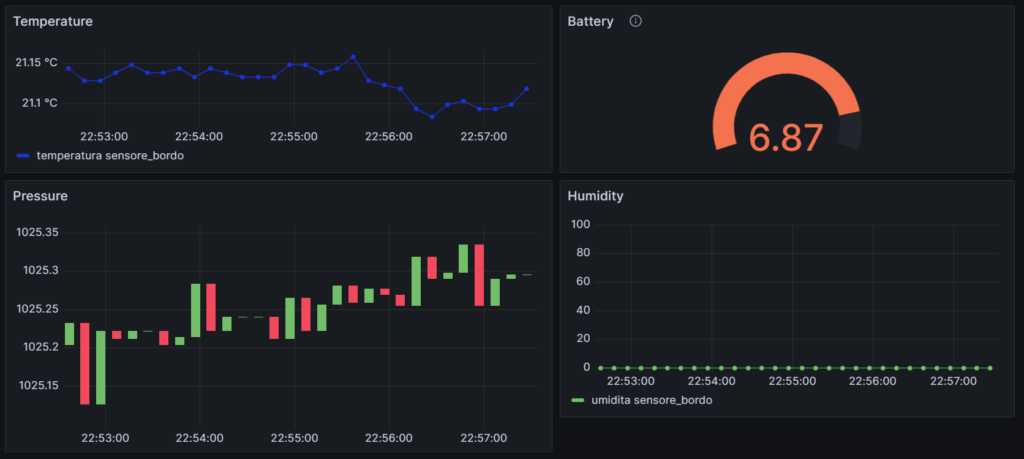
Similarly, you can add other panels with different data and types of visualization
Conclusions
The activity was carried out with the students over the course of a week, although the actual development engaged them for three days.
As you can see, what we somewhat grandiosely called the Mars Rover, aiming to be an innovative Raspberry Pi project, spans various areas: Python development, socket connections, protocol development, smartphone app development, data storage in a cloud database, and finally visualization using a visually impactful tool like Grafana. It is, of course, up to the group coordinator to provide proper explanations to guide the students through the various stages of the project development.
Another important aspect, which was one of the project’s objectives, is identifying emerging issues and the limitations of the Rover to define what are called “lessons learned,” which the team developing the prototype must take into account.
The result was more than satisfactory, even though time was limited; the experience provided an insight into how a project unfolds in a corporate setting.